
Communities module
Adding & Editing a Community
Adding a property
Adding a property
- Go to Communities and click Add Community.
- Enter the Property Name and Property Manager Email. Unit Count and Phone are optional. Click Continue.
- Start typing the Property Address, then select the correct result from the autocomplete dropdown. Do not only type the address and continue.
- Selecting the dropdown result automatically fills State and Zip Code and attaches the latitude and longitude used to locate the property. Confirm the populated values, then click Continue.
- Choose the Service Days, set the property to Active or Inactive, and click Create Community.
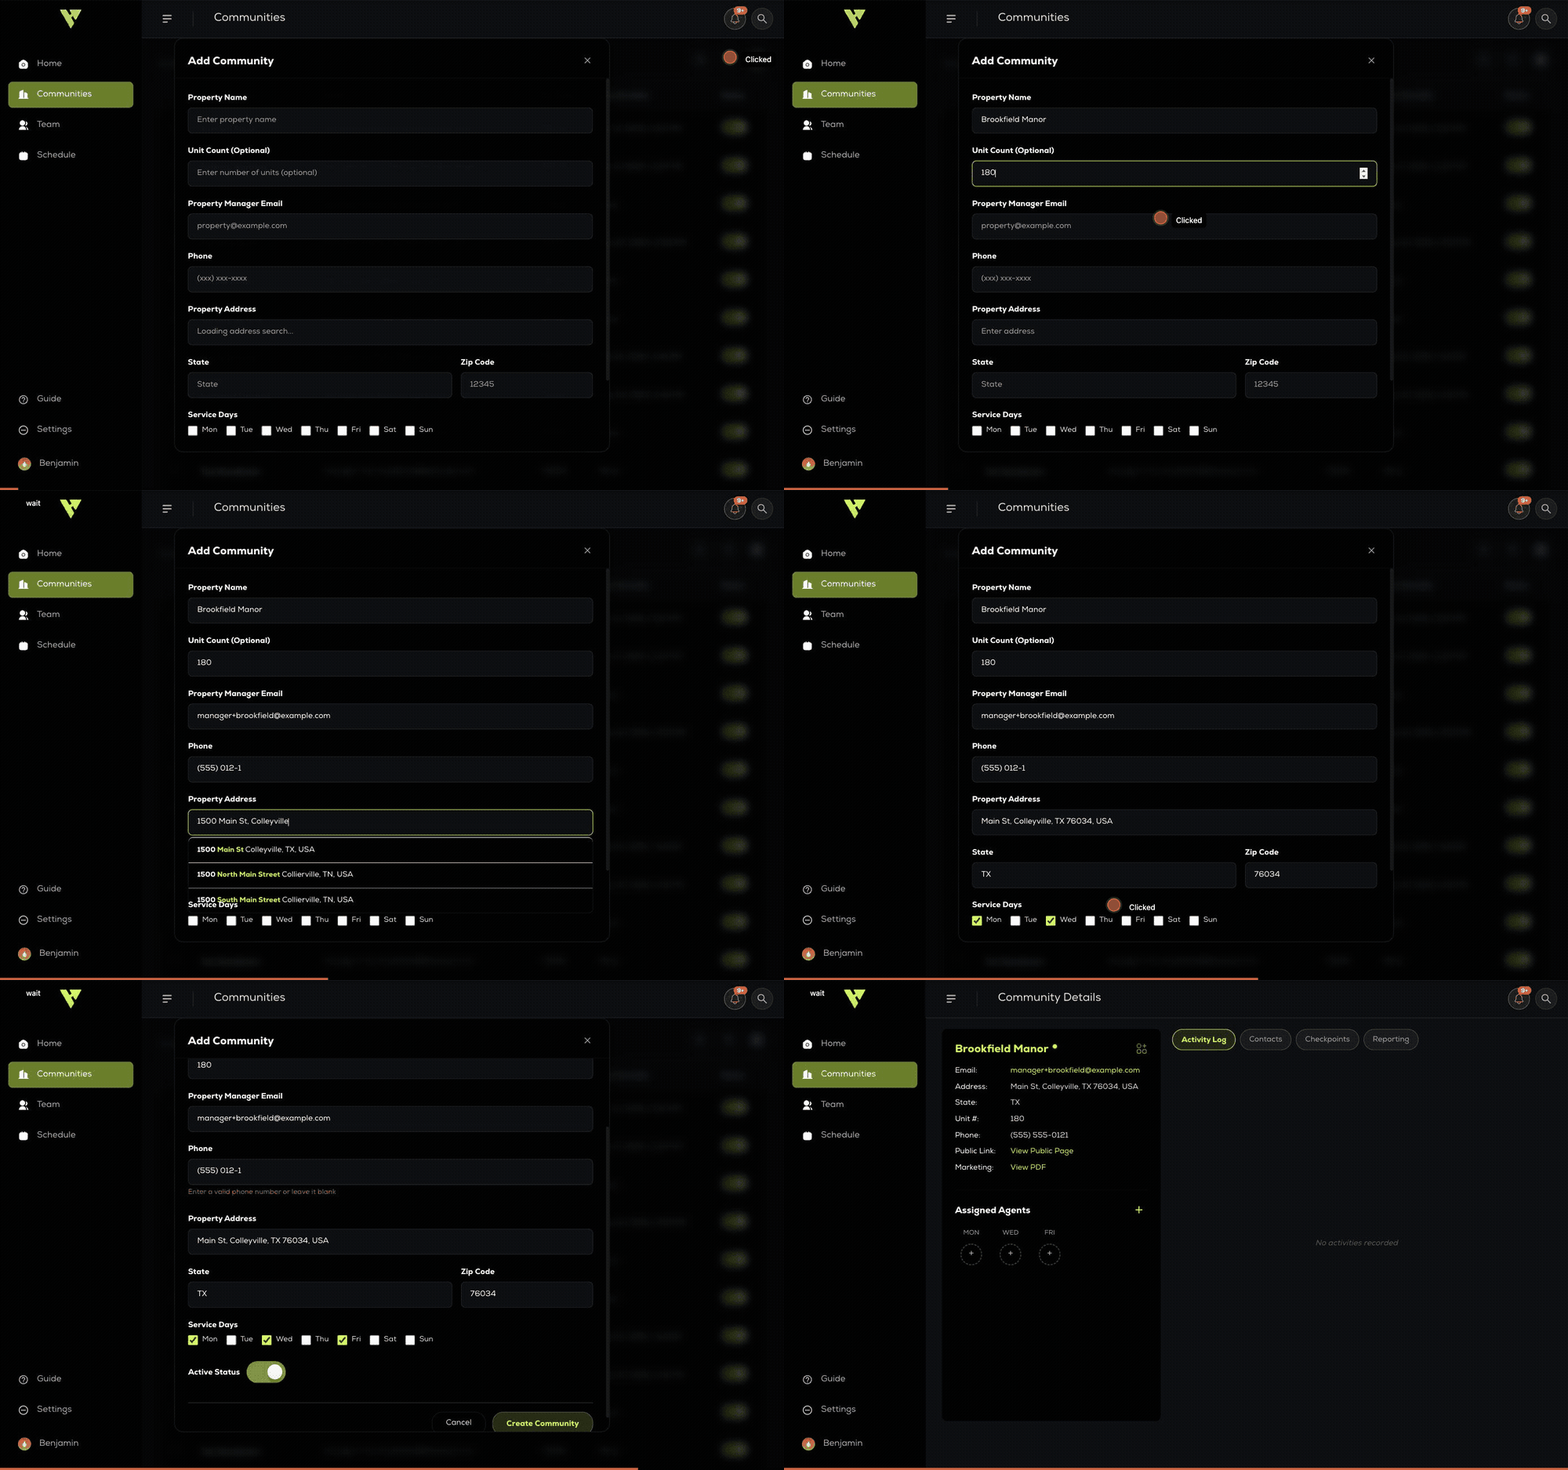
The address field searches as you type. Selecting a suggestion is required: it fills State and Zip Code and stores the property latitude and longitude. Those coordinates power the property map location and location-based field workflows.
Editing
Open the property and use Edit Property Details. Changes take effect immediately, including on the mobile app.