
Routes module
Managing Stops
The Routes page opens on your stops list.
The Routes page opens on your stops list.
The stops table
Columns show Label, Address, State, Route, Last Arrived and Status, so you can see at a glance which stops are covered and which were serviced recently.
- Use Search stops to filter by name or address.
- Toggle Show inactive to include stops you have deactivated.
- Stops not yet on a route appear as Unassigned.
Adding or editing a stop
- Click add, or the edit icon on an existing stop.
- Address — the service address. Label is optional and defaults to the address if left blank.
- Add State and Zip Code.
- Customer Phone — required if you want this stop to receive arrival and completion texts.
- Notes — gate codes, placement instructions, anything the driver needs.
- Set Active and save.
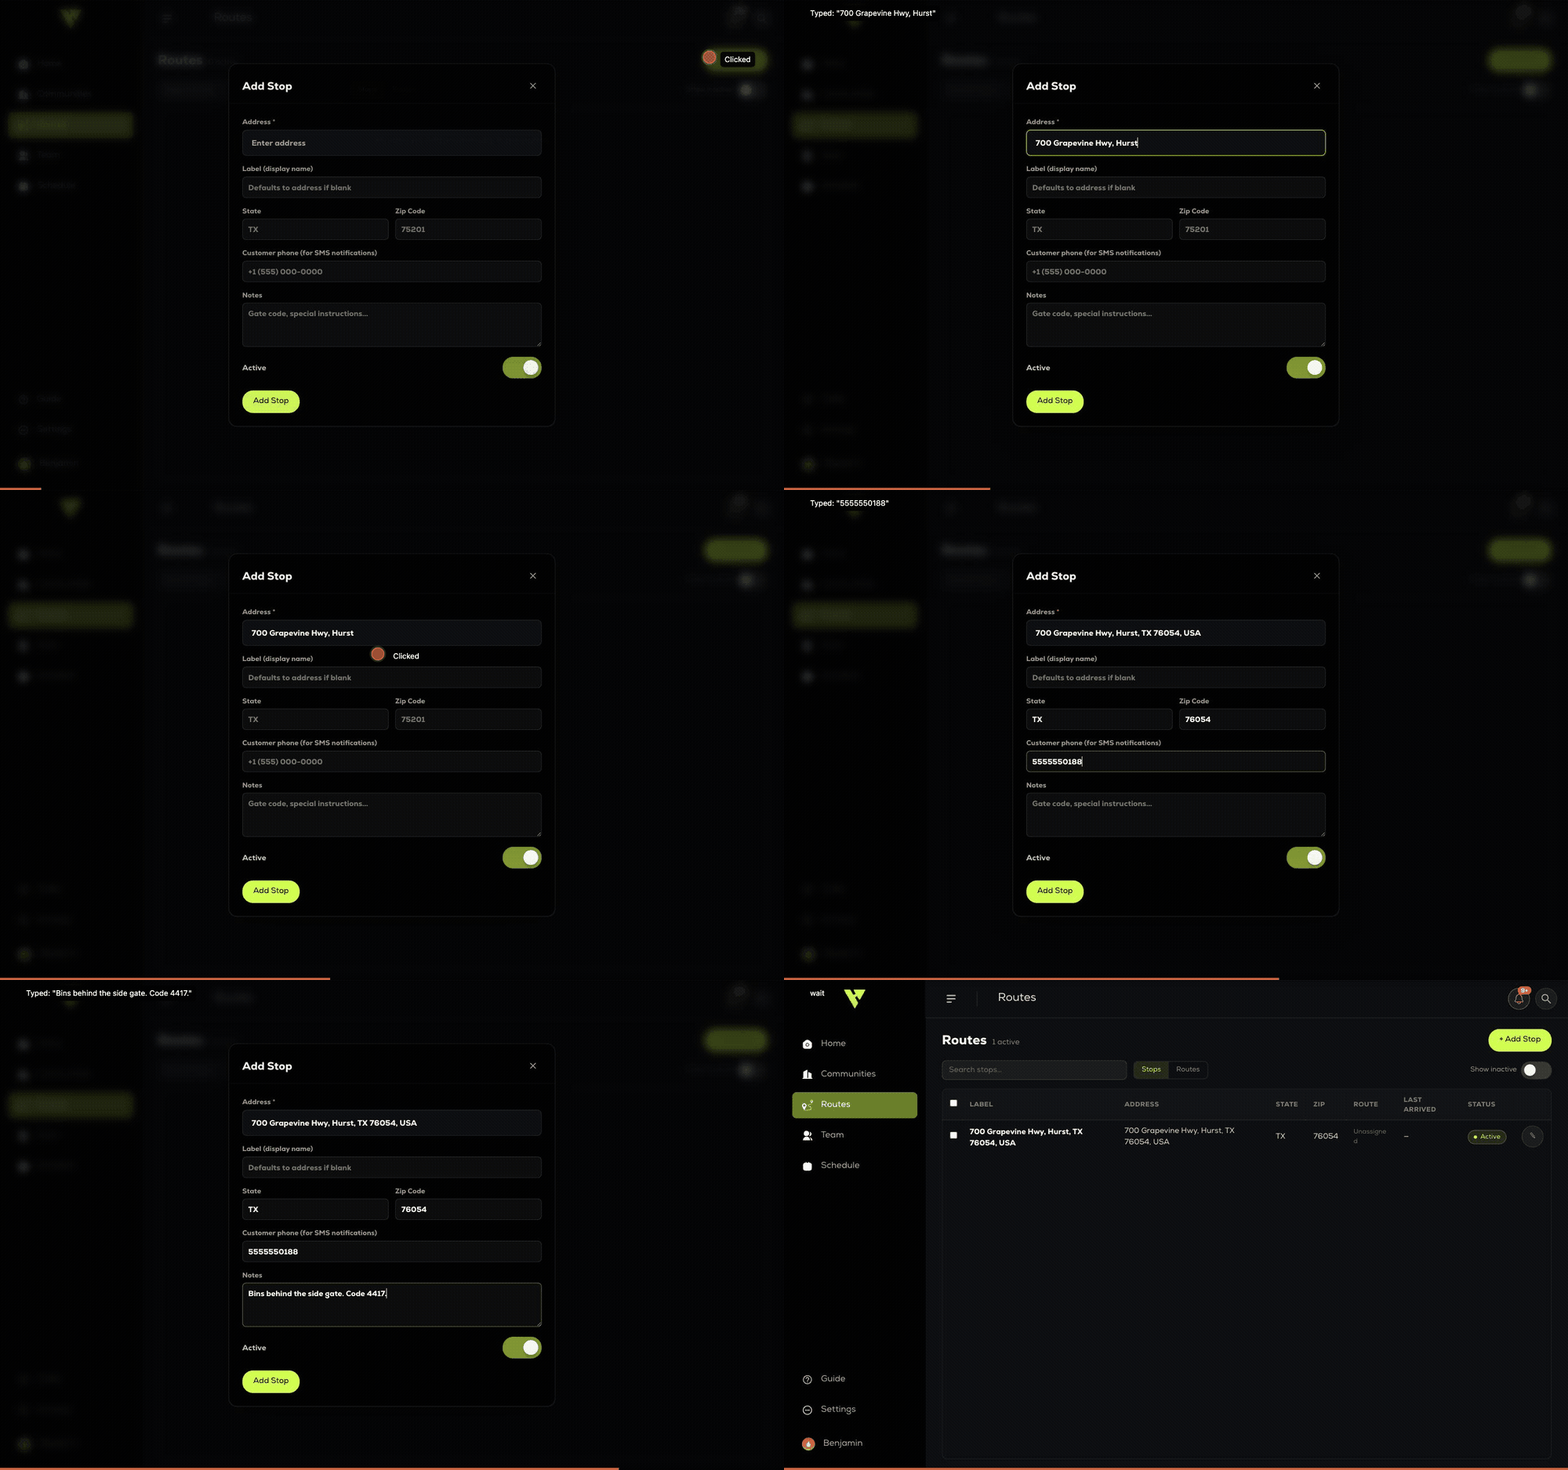
Pick the address from the suggestions rather than typing it out. That is what gives the stop its map location — a typed address that never matched a suggestion saves without one, and the app will warn you once before letting it through.
Working in bulk
Use the select-all checkbox or tick individual rows, then move the whole selection onto a route in one action. This is how you build a route quickly rather than adding stops one by one.