
Shift Reports
The report you send a property manager to show what you did. Built on demand, as a PDF.
The report you send a property manager to show what you did. Built on demand, as a PDF.
- Open Shift Reports.
- Choose All Properties or select a specific property.
- Set a Start Date and End Date.
- Choose which statistics to include under Select Stats to Include.
- Review the preview.
- Generate the report.
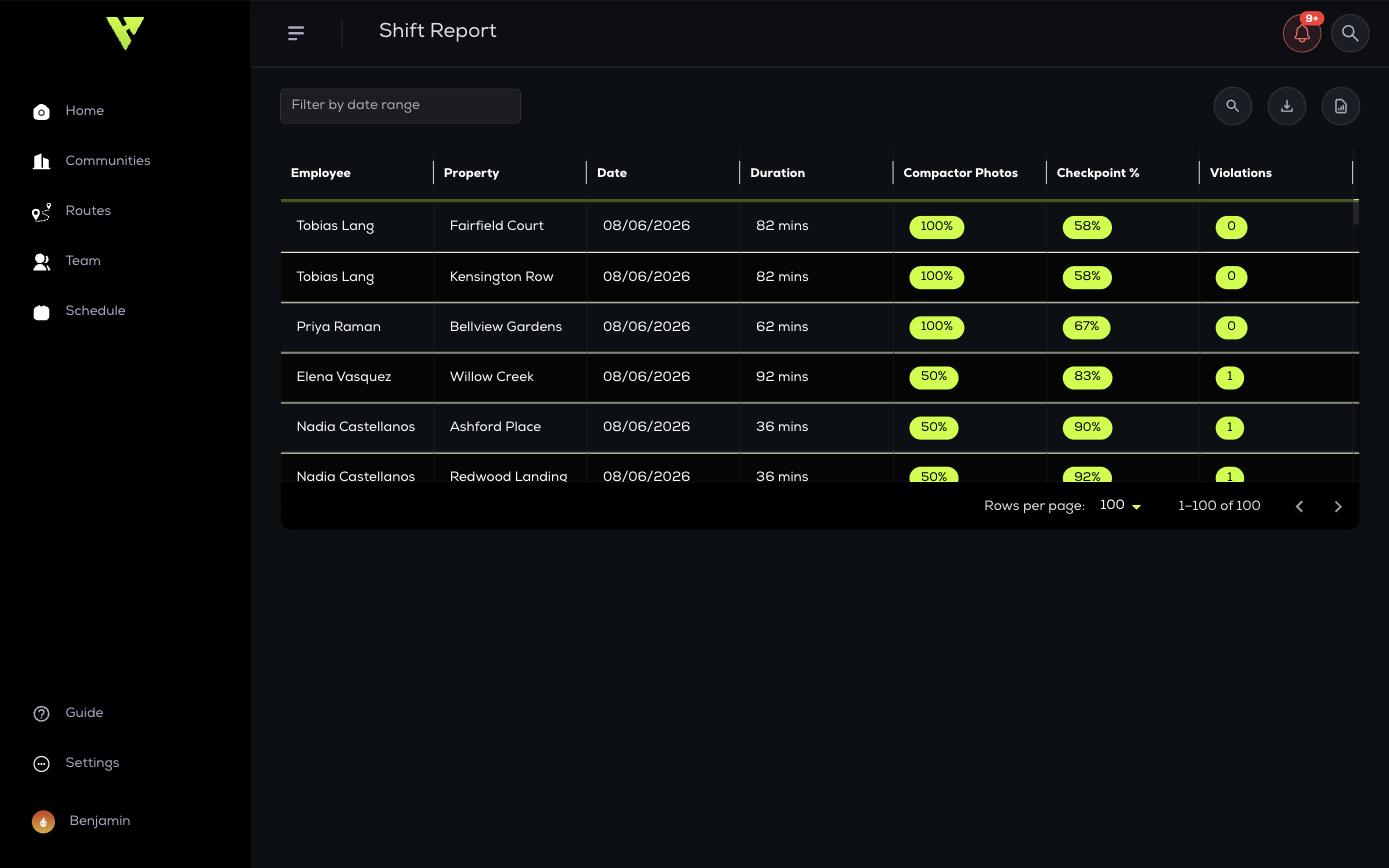
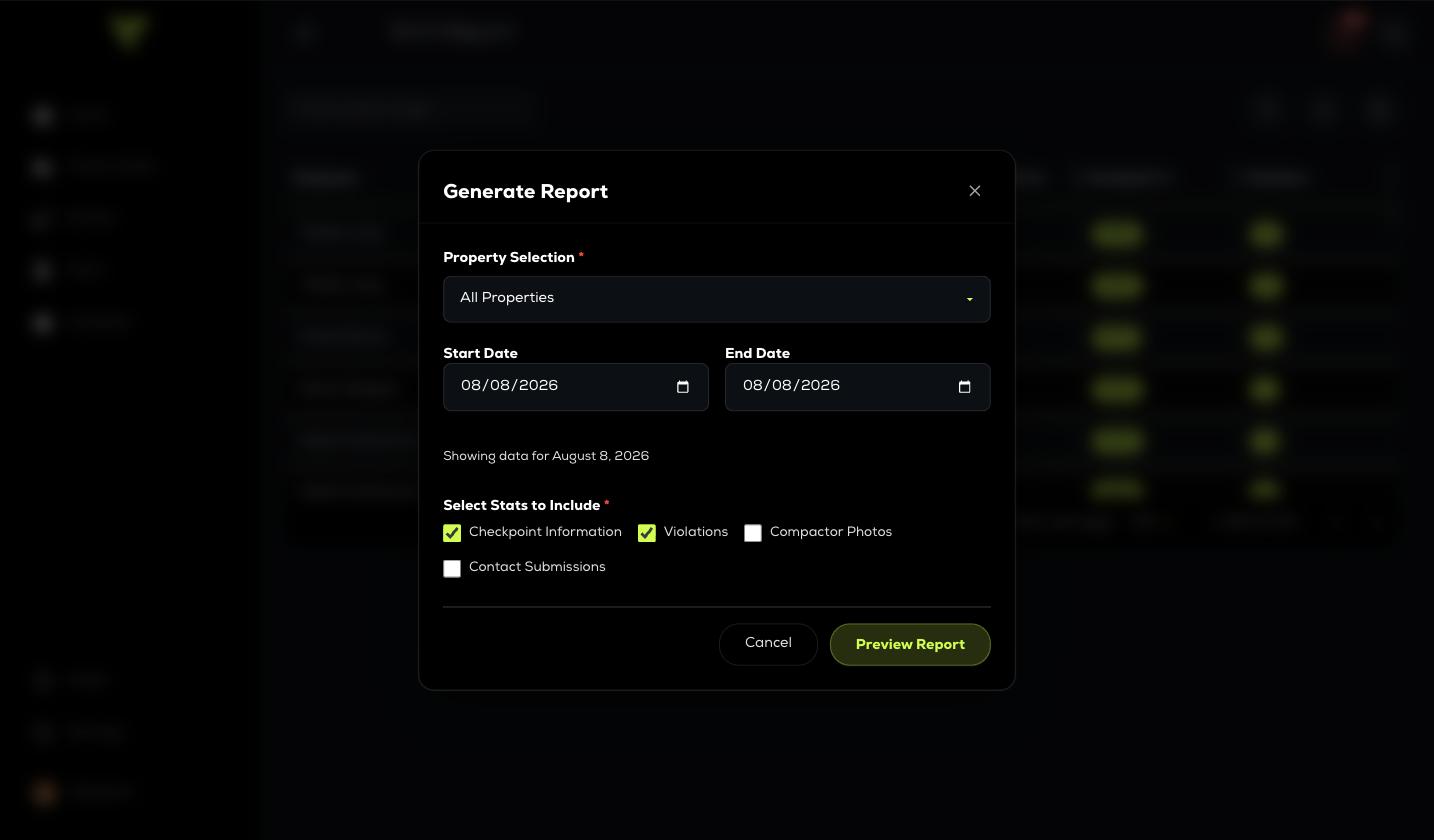
The line under the dates confirms the range it resolved to — worth reading before you generate, since an off-by-one date range is the easiest way to send a client the wrong month.
The preview
Preview Report builds the report in the browser so you can check it before it goes anywhere. A wide range across all properties takes a while to assemble — give it time rather than clicking again.
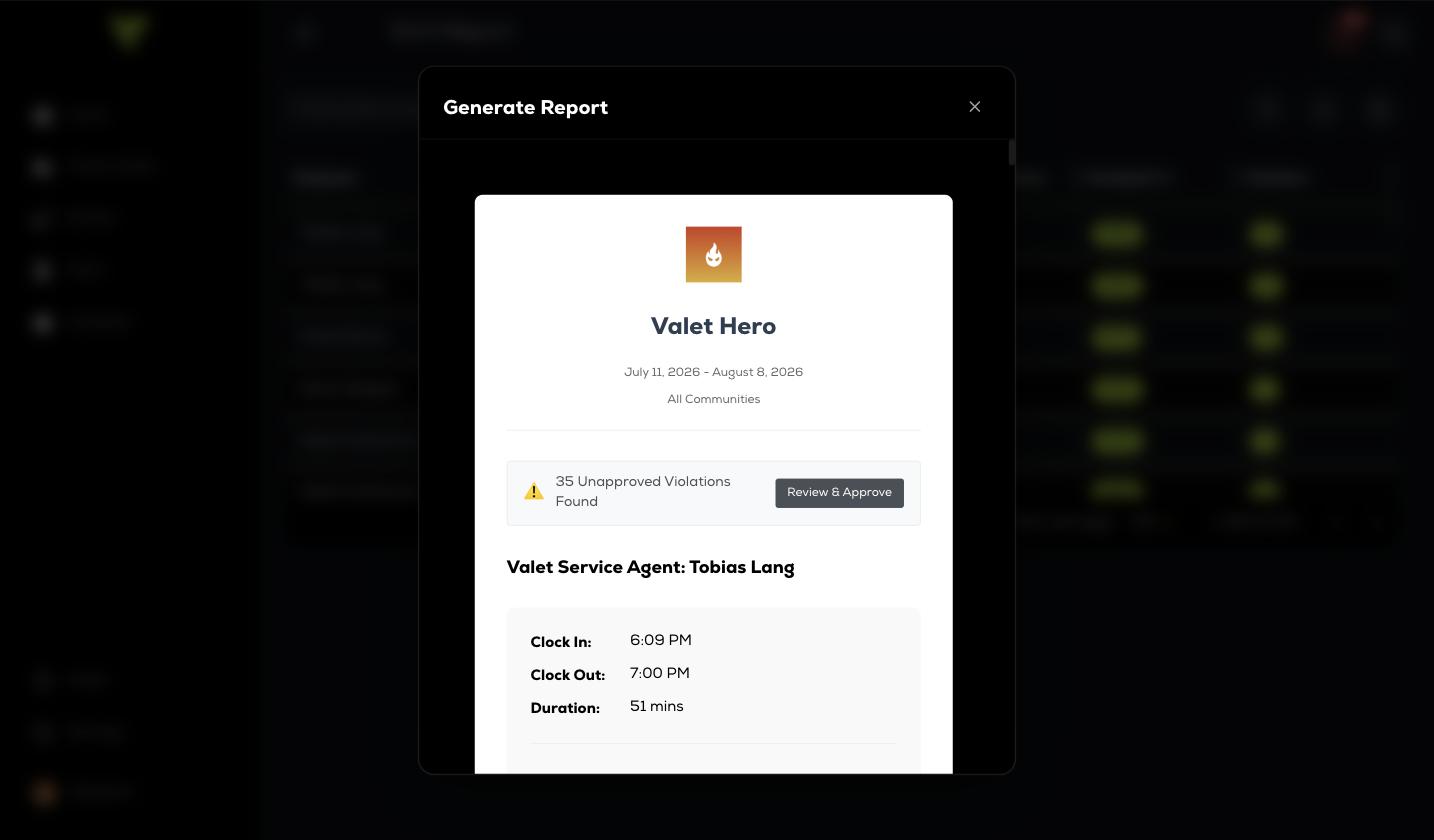
If any violations in the range are still unreviewed, the preview says so at the top and offers Review & Approve. That banner is the last chance to catch them — see the note below for why it matters.
What a report can include
- Checkpoint information.
- Approved violations, with photos.
- Compactor before and after photos.
- Contact submissions from the resident portal.
For a report that sends itself on a schedule, use automated reports on the community's Reporting tab instead.